For our final project for our Website Localization class, my group decided that we wanted to work with a CMS that none of us knew anything about. We chose Magento, a popular ecommerce CMS with a free open source version (Magento Open Source). When selecting this CMS, we did not look into how easy it was to localize, thus mimicking a real-life situation, where the company we work for or our client may not have factored in localization as a consideration at all when selecting the CMS for their website.
Fortunately, Magento Open Source happens to be a CMS where localization is baked into the system, and it is not at all an afterthought that requires extensions (like Drupal and WordPress, the other CMSs we worked with this semester, Magento has a Marketplace with free and paid third-party extensions).
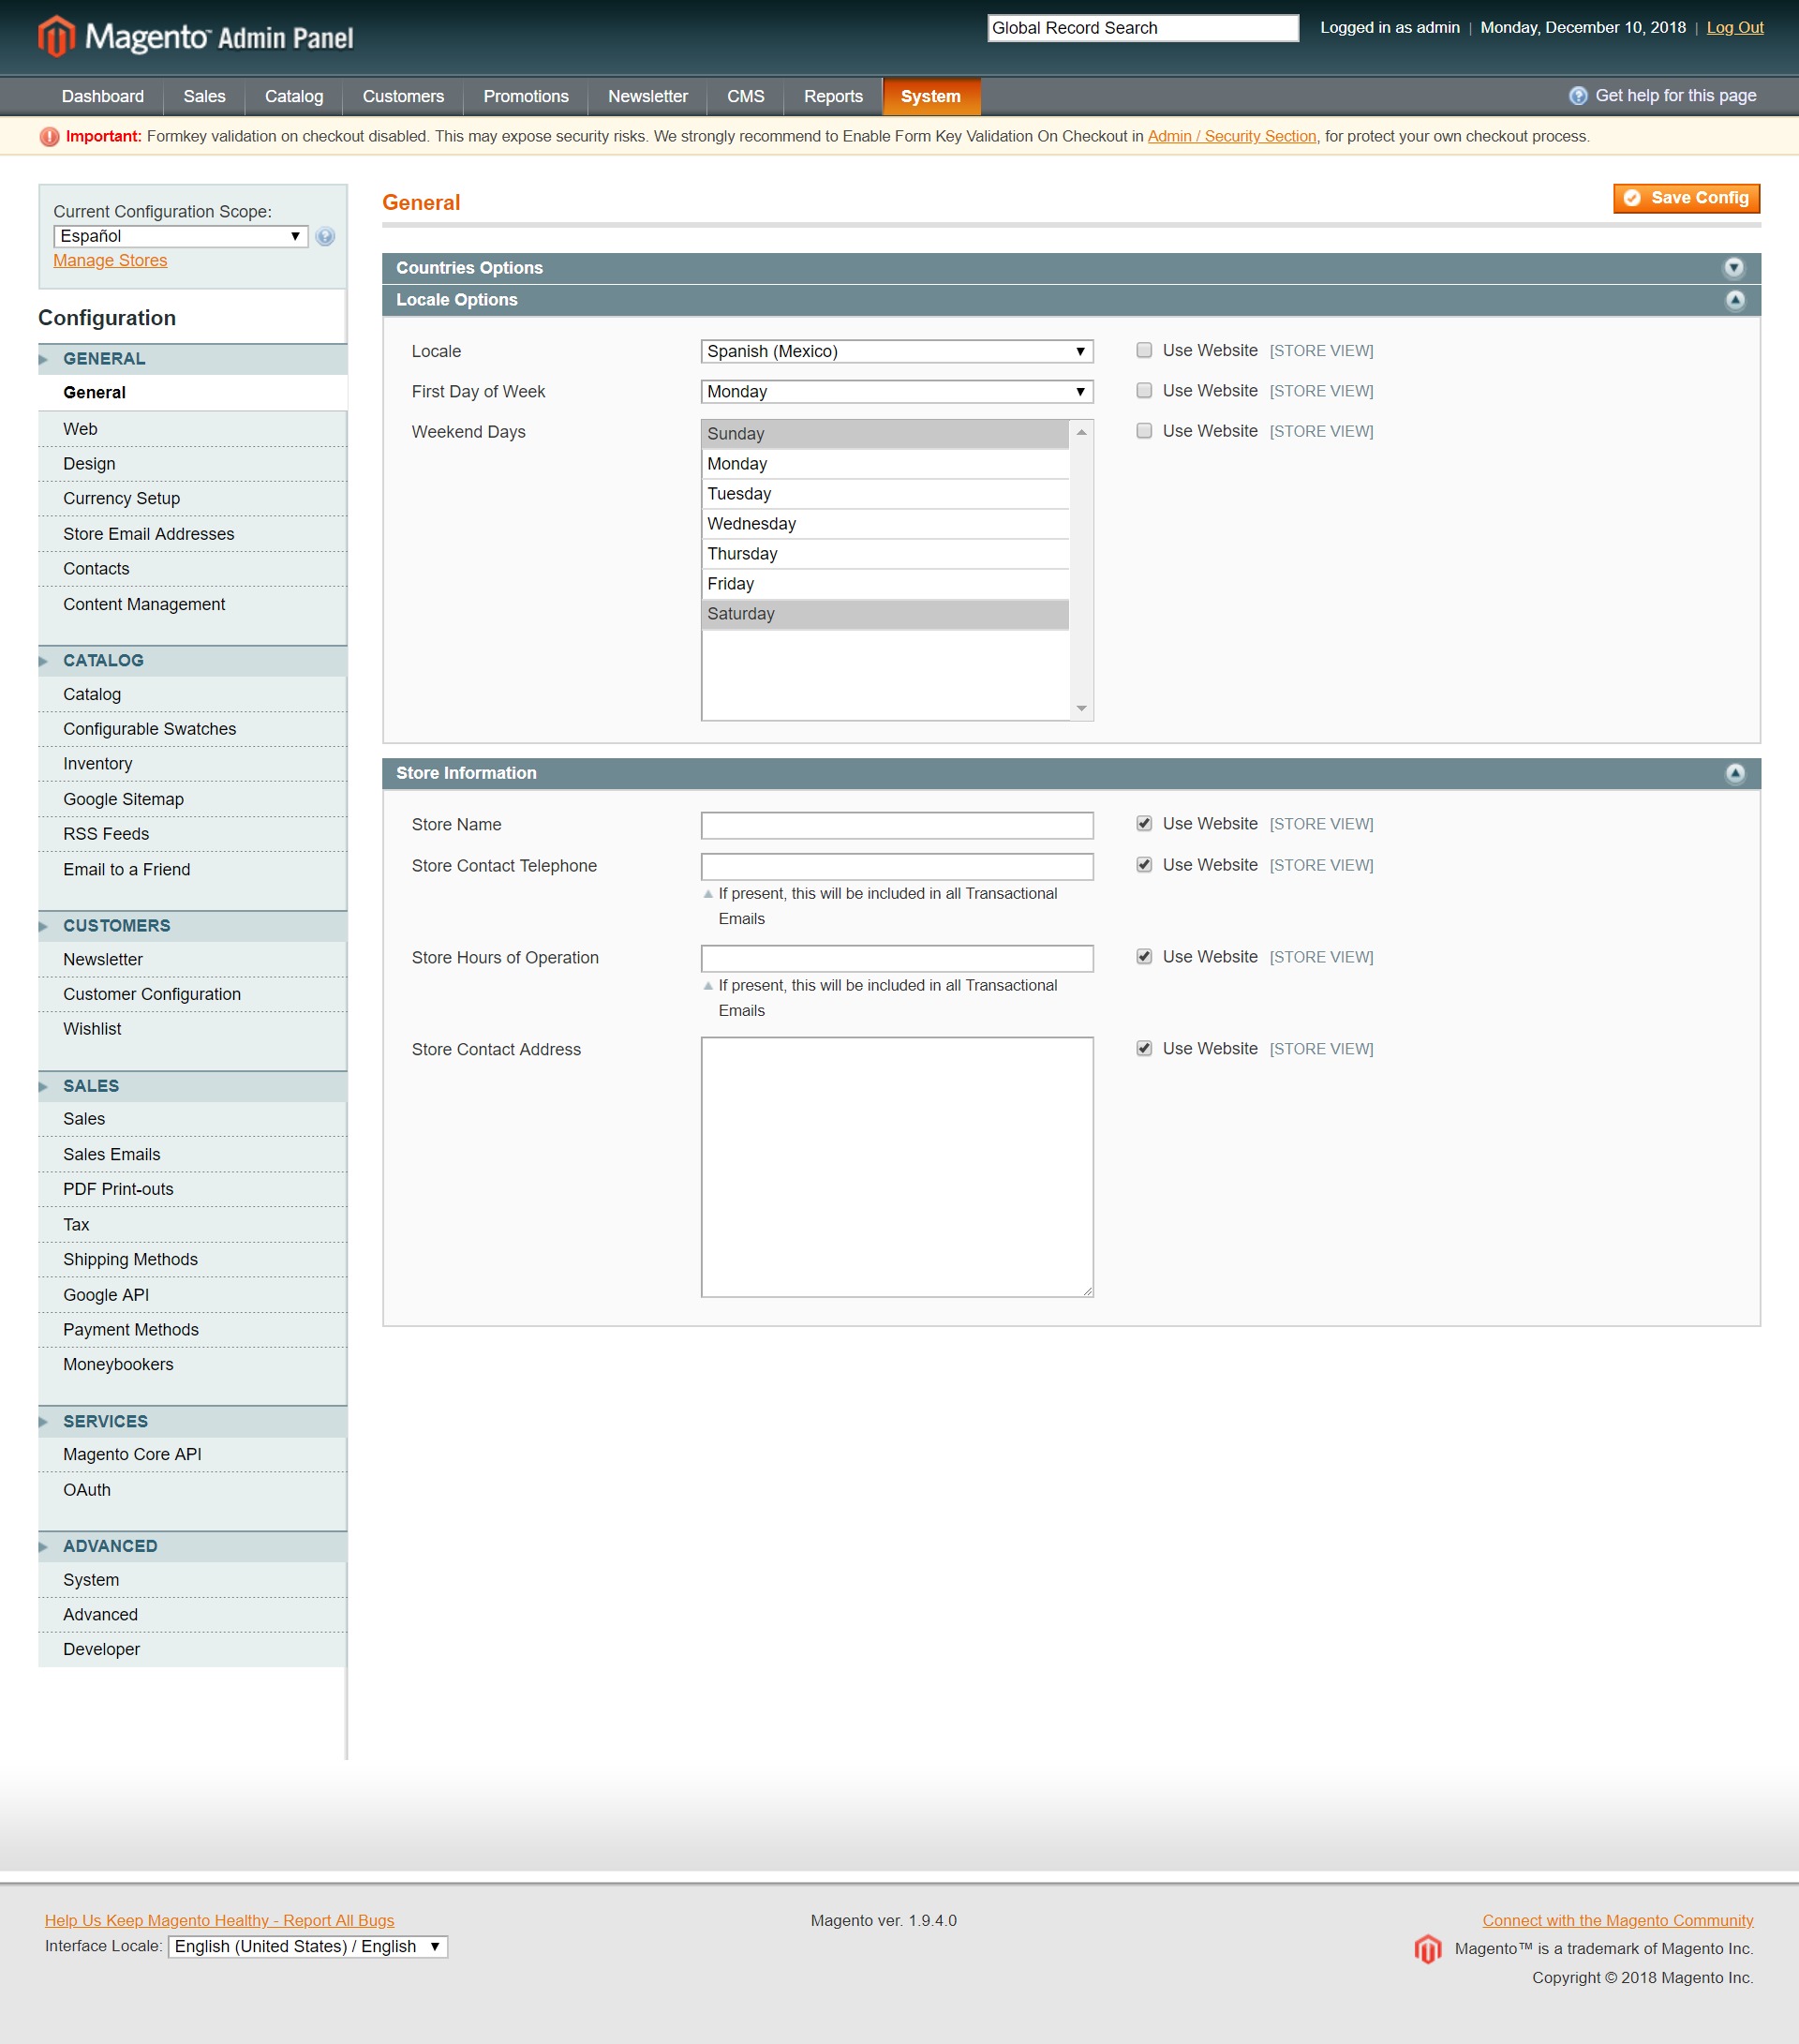
The most important step to localizing a Magento site is adding a store view. You have your store overall, and then your main view. To add a new localized version of your store, you rename your store view to your original language–in our case, English–and then this is the language that will display in the dropdown language switcher on all your pages. (which will display automatically once multiple views are enabled). You then add a new view with your new language, which in our case is Spanish (which we put as “Español” so it will display as such in our language switcher).
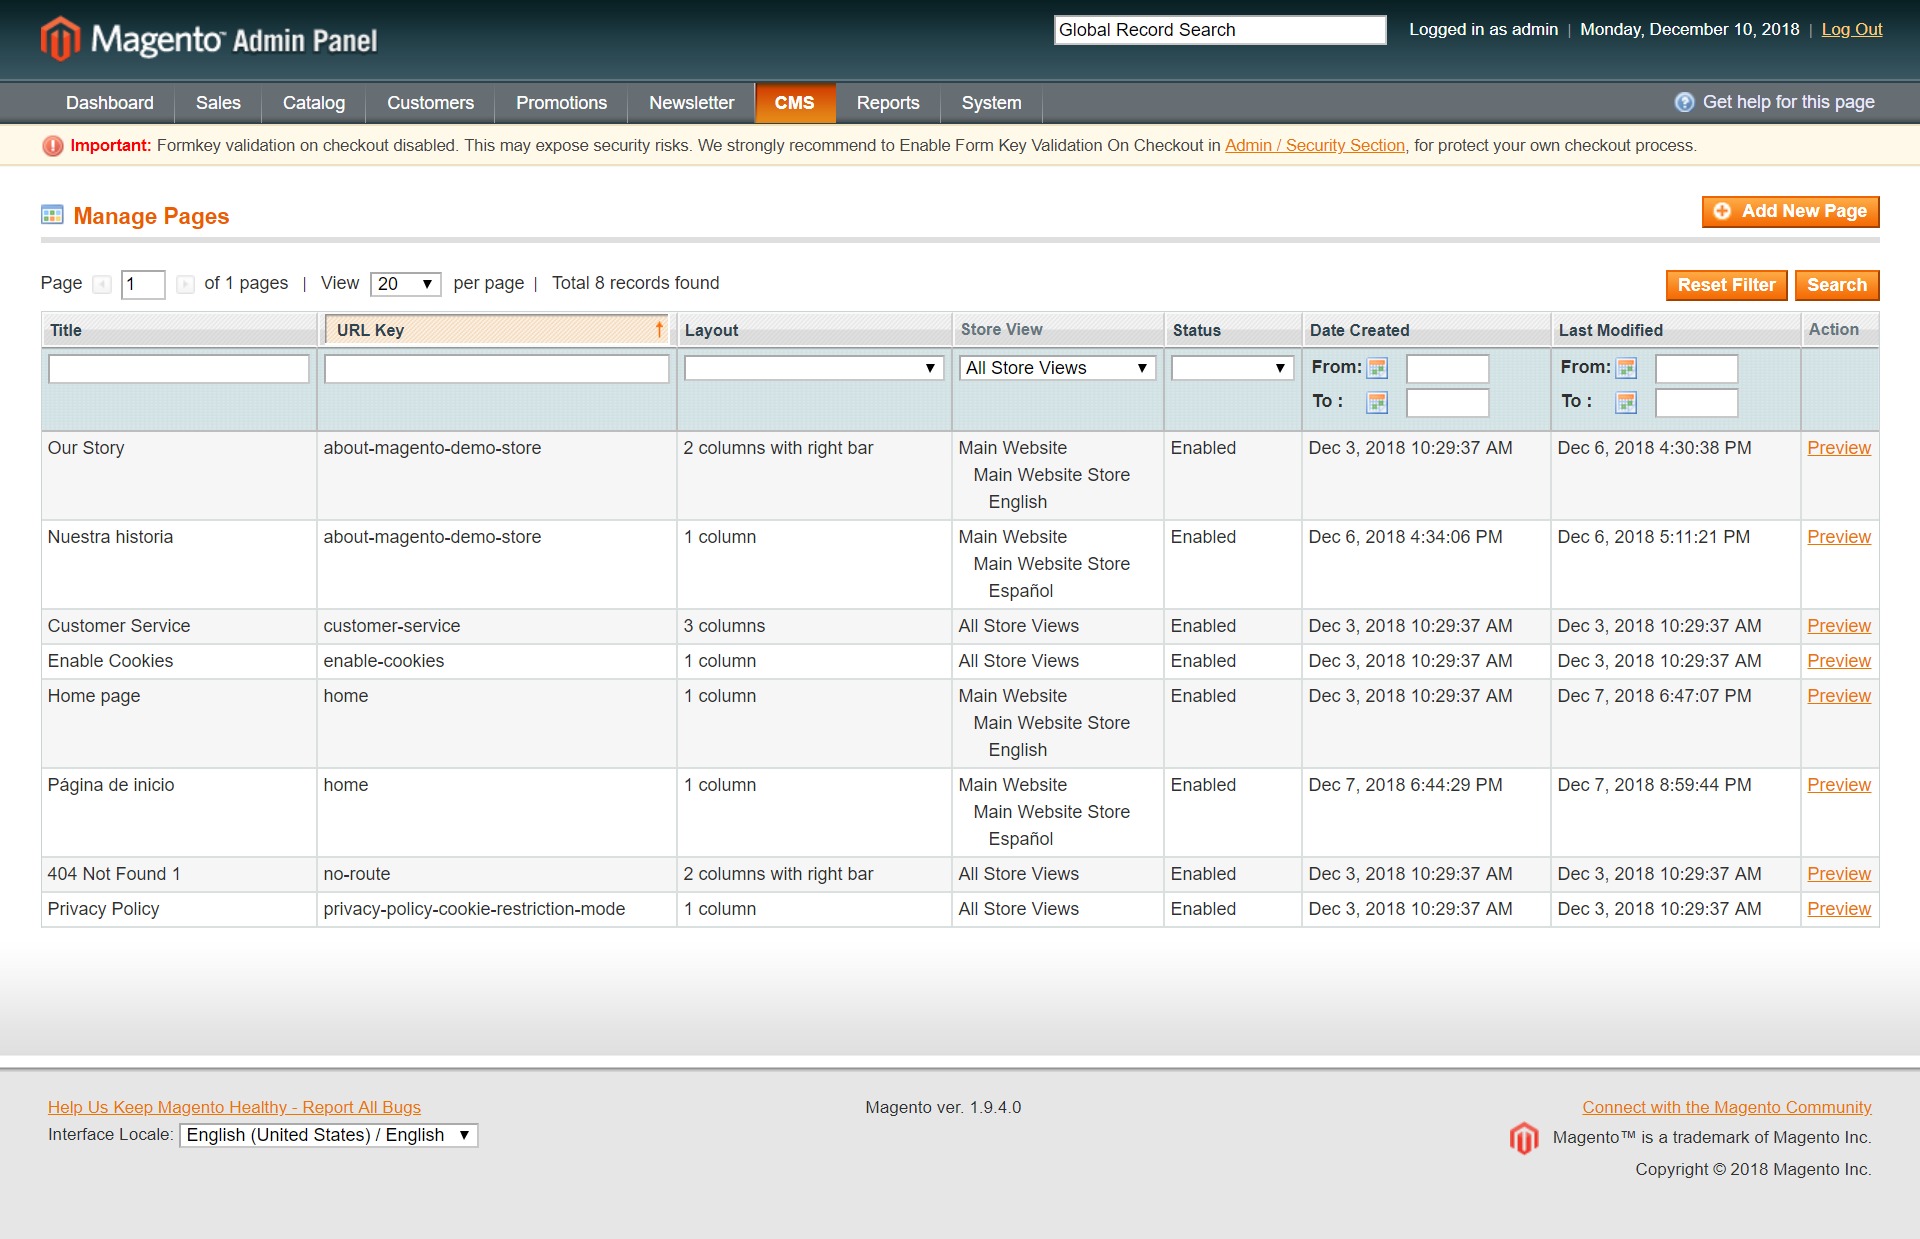
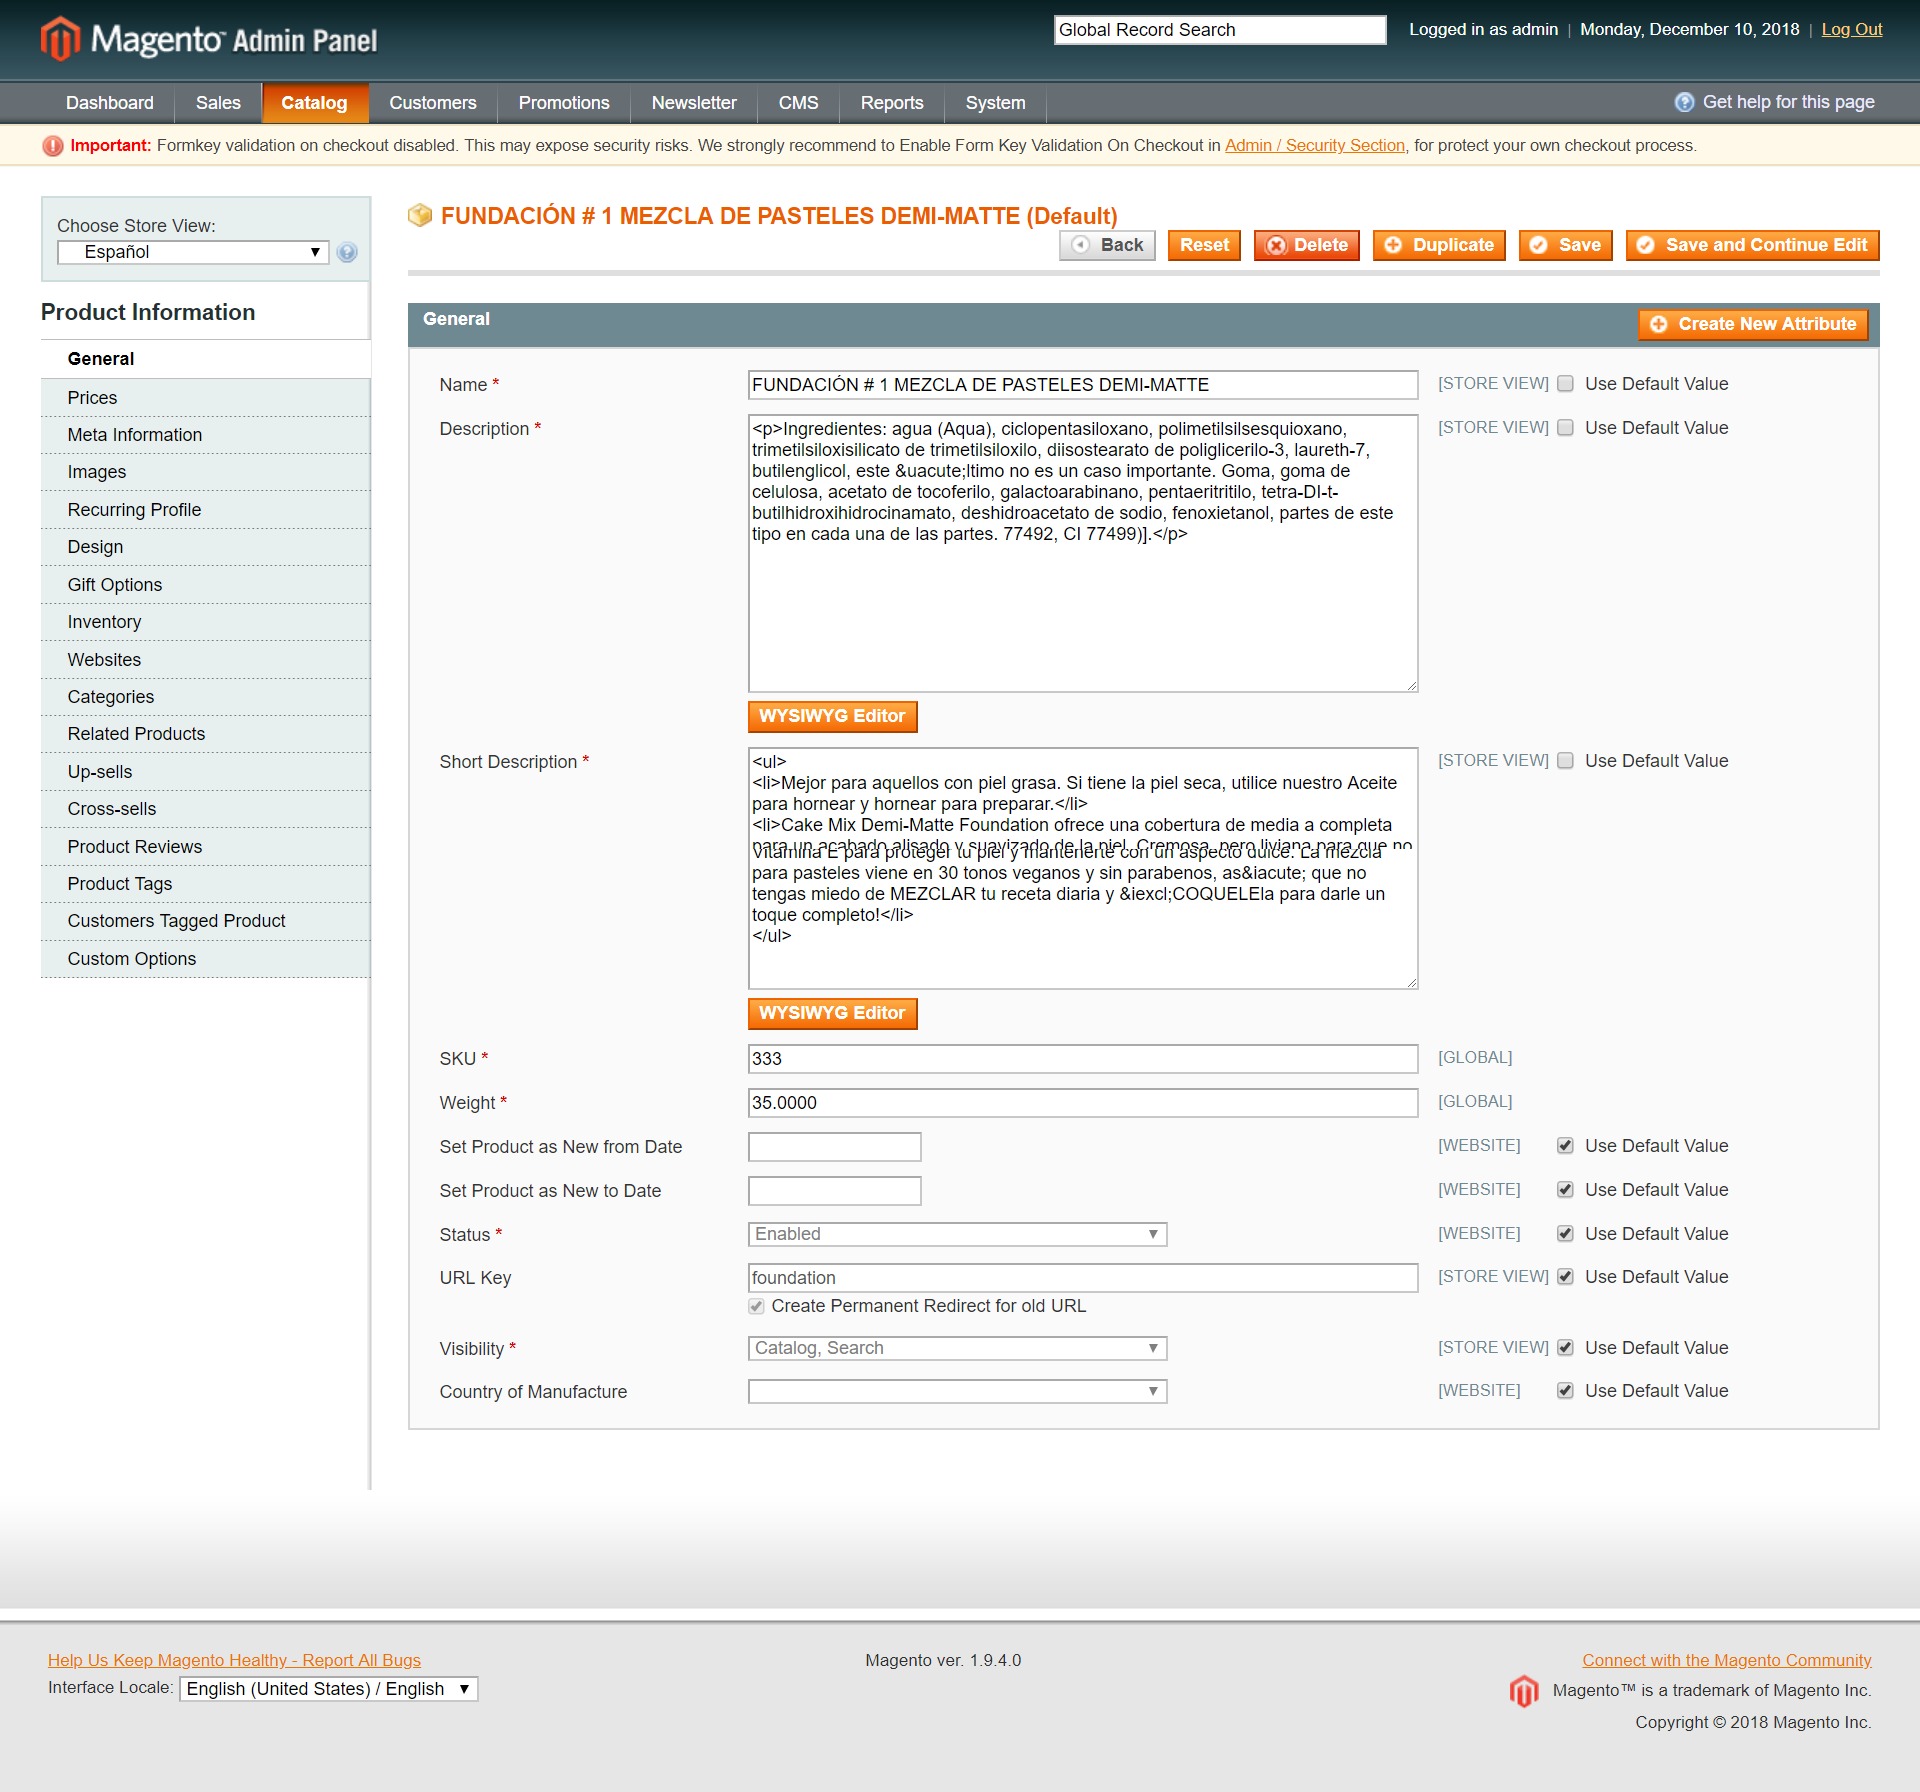
Then, for all the translatable content that is handled through the CMS and Catalog features in your administration dashboard, you simply add a second version with the translated content. You keep the URL key (for pages, categories, and products) or identifier (for blocks) the same, and then it will display when the visitor is navigating to that page in that language, and they can switch back and forth between the different languages. The content that is translatable in this way includes posts, products, product categories, blocks (sections of the footer links and whatever else you want to add to your layout), and widgets.
There is also translatable content that you do not alter within the dashboard, and can only be changed through altering the modules and theme of the site (or the Inline Translator, as I will get to later). I will refer to these as “strings.” For string translation, there are free options that do not involve extensions. The site WebInterpret has put together a guide, and I have taken my information from there.
We had to install an older version of Magento, and Magento 2 has seen huge updates (as has Magento’s acquisition by Adobe). One of the things that seems to have disappeared is that Magento no longer seems to provide official free translation packs, which all of the sites we consulted in our research referenced. Translation packs contain translations of strings, and once you install them the way you would any other extension, you would only have to go and look at your site and see which strings remain to be translated. Unfortunately, we could not find any free es-MX language packs in the Magento Marketplace, and so we had to translate all the strings ourselves.
There are three ways to do this. The first is theme translation. This means your translations will only work in a specific theme–the design you have selected for your site–and if you want to change your theme, you will lose all your translations. This is accomplished by finding the translate.csv file in your default view using your file manager or FTP program, with the following file path: app/design/{area}/{package}/{theme}/locale/{language_code}{country_code}/translate.csv. This file would simply contain a list of strings and you would add the translations: "My Cart","My Cart" would become "My Cart","Mi carrito" and so on for every string requiring translation. I would then place this file in a es_MX folder in our theme.
I found this file in our installation, but it only contained one string, so it didn’t seem like an efficient way to localize our site.
Next is module translation. In this method, you are again working with CSV files. You go to app/locale/{language_code}_{country_code}/. There, you will find all of the CSV files for your modules. You would follow the same translation process as you did for theme translation. Unlike the theme translation method, your translations are not dependent on your design. This is probably the best method for companies with a developer team. If you create or edit modules yourself, you can wrap the strings that need to be translated, i.e., _("Hello World!"). Since we were short on time, and there were a lot of CSV files for modules, we decided against this method. A bonus of the CSV files, however, is that you can use CAT tools with them. Memsource has special support for Magento CSV files, for instance.
In the end, we went with inline translation, which does not require any developer skills at all. This is something built into the Magento system, and once it is enabled, you can navigate to view you wish to localize and simply click on the words and phrases surrounded by a red box and enter your translation. This is very easy, and allows the translator to see the text in context.

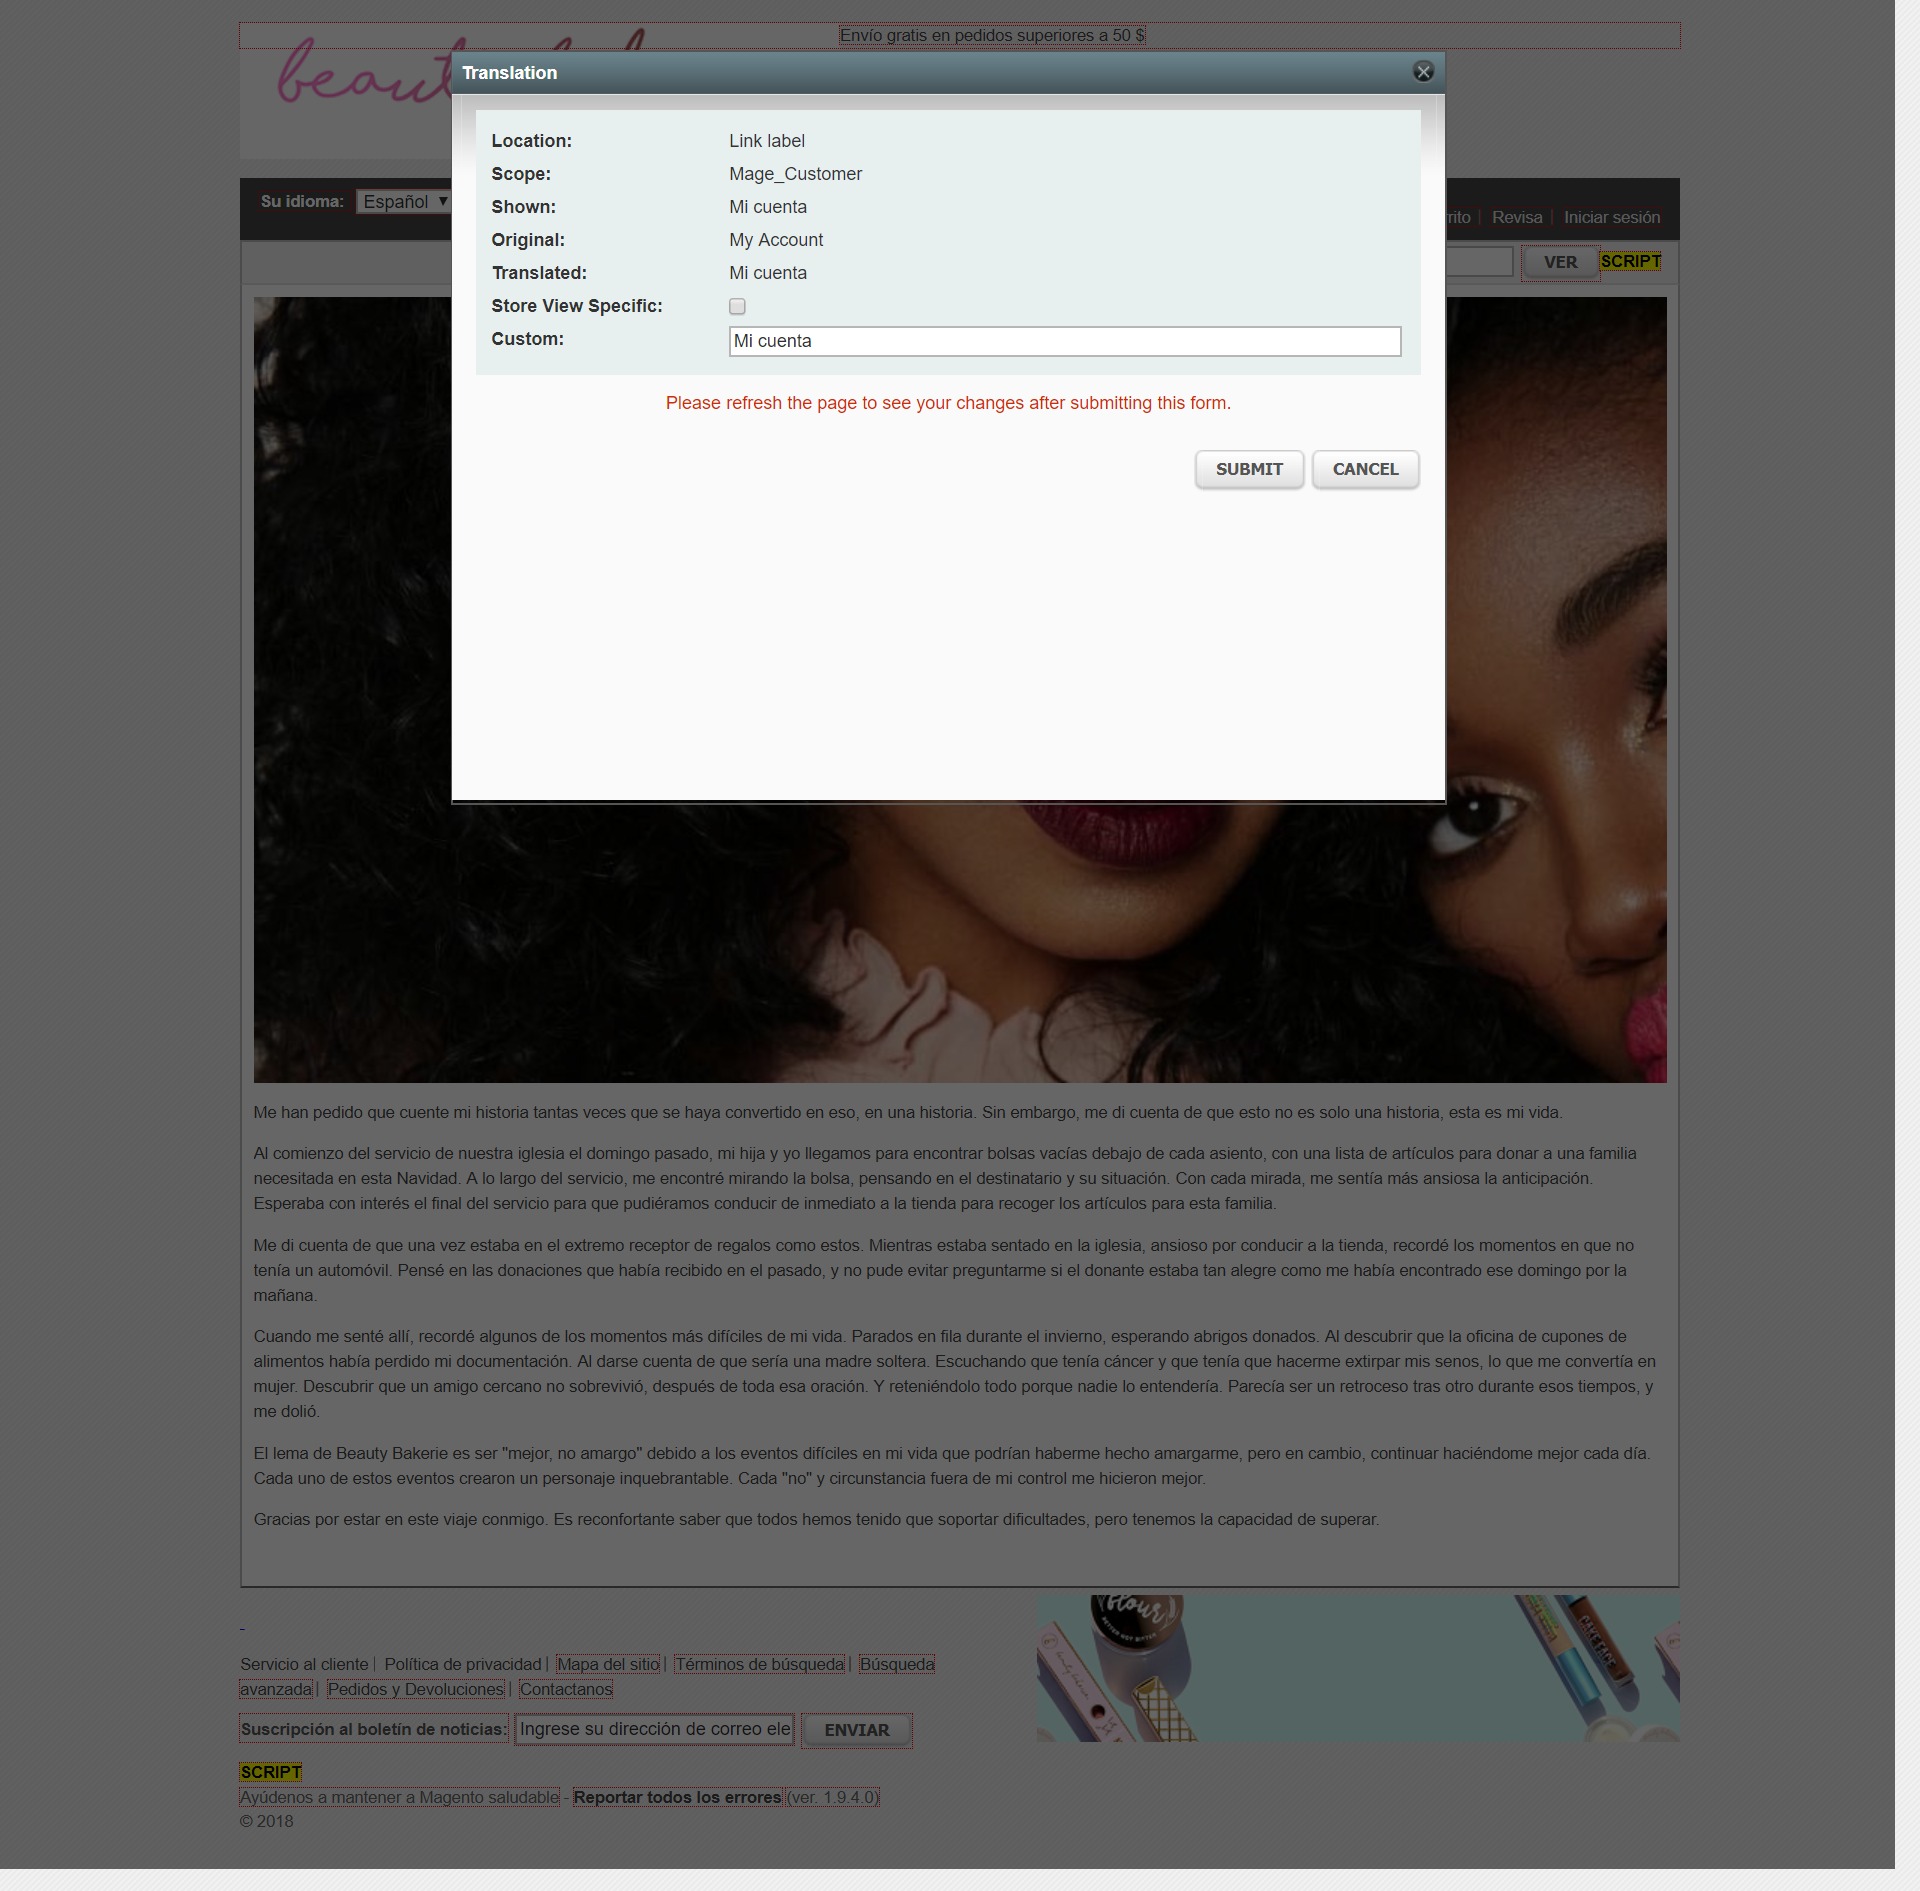
There are a few major flaws in this, though. One is that there is no way to know whether all your strings had been translated. You just have to go through the site and look to see if there are any untranslated strings. The second issue, which is huge, is that you do not need to be logged in as an administrator to do this–you do not need to be logged in at all! If inline translation is enabled for that store view, anyone who goes to your site and looks at that view will see the red boxes and be able to change the translations. (It is probably better to do this on a MAMP server or the like for this reason.) From our experience with other CMSs, we had simply assumed that one had to be logged in to make changes–but this was not the case, as I discovered when I looked at my site in incognito browsing mode and still saw the red boxes. The third is that it is inefficient and you cannot use a CAT tool or just go through a list, like you can with the CSV files. You have to go through and enter all the translations individually by clicking around the site.
A major issue with all of these methods of translation is that the different store view does not have a different url. When I switch to the Spanish site, the URL displayed in the address bar is http://magento.tlmcreate.com/index.php/?___store=spanish&___from_store=default. The next time I go to magento.tlmcreate.com, it will be in Spanish. If we were making a store for Mexico, it would be better to create a separate store, and not just a store view, for SEO purposes, so that shoppers in Mexico would find our site when searching in Spanish.
Overall, this project gave us the opportunity to go into a new CMS cold and figure out how to localize it. It took a fair amount of trial and error because we not only had to figure out how to localize it, but we also had to learn an entirely new system. It was sheer luck that we happened to choose one that was not only natively set up for localization with the store view function, but that it also had its own inline translation feature and different options for string translation to consider and experiment with.